Taking Care of Your Mental Health in the Fitness Space
I can’t recall a moment during my time working in the fitness industry where I didn’t hate myself.

It seems ironic when you think about it. Fitness is supposed to be about health and living your best life possible. Why then, do we find ourselves stressed and anxious rather than inspired?

When you’re living in a world that thrives on the concept of insufficiency it can be difficult to keep a healthy perspective on diet and exercise. It’s not hard to see how disordered eating and mental health struggles can be associated with the fitness industry because of this.

Most of the articles in the top-selling fitness magazines play up insecurities, encouraging us to jump on every latest trend to change all the things we dislike about ourselves. It’s all about how much we can take away from our body, and how tracking everything we eat and do is necessary for any kind of noticeable progress. Physical activity becomes another gateway to feed disordered eating habits.

We use words like “dirty,” “bad,” and “cheating” to describe certain foods or the consumption of them, thinking it’s an innocent way of reminding ourselves to eat better. In reality, this kind of language is quite harmful to our mental state.

Giving any kind of negative association to the food we eat implies there is something wrong with indulging in it. It’s like a form of self-manipulation, because we are making ourselves feel bad for things we have no reason to feel bad about. If you’ve ever experienced genuine guilt for ordering off the dessert menu, you know what I’m talking about.

We celebrate antisocial habits and withdrawal from friends and family due to restrictive eating in the name of “health,” leading to even higher irritability levels from a lack of involvement in the activities we would normally enjoy participating in.

The cycle seemingly never ends.

Suffering in Silence

Eating disorders are just one aspect of the mental health strains endured in a world dominated by images and numbers. For those of us who suffer from depression, anxiety, obsessive-compulsive disorder (OCD), or any other kind of mental illness, the drive to adhere to these numbers and constraints we have created for ourselves is exhausting.

Unfortunately, mental illness tends to fly under the radar and to get pushed to the backburner when we are working hard to achieve our goals.

Think of it like a credit card statement that we’re embarrassed to talk about. While we don’t want to acknowledge its existence, we know it’s there. It builds and becomes more daunting, until it grows totally out of control. Yet we’re afraid to address it.

Those who suffer from anxiety or depression are more likely to develop an eating disorder as a result of their altered mental state. So if you already suffer from mental illness, you are at a risk of making things worse when you start to involve more calculated measures of control over what you eat and how you exercise [9,11].

That being said, there is still a great amount of stigma that surrounds mental illness, which can make it difficult for some people to be open about what they are going through in order to seek help. Suffering in silence usually means that we find a different way of coping. When that comes in the form of extreme diet swings and over-exercising, it can be very damaging to our long-term physical and psychological health.

So what can we do to protect our mental health?

Luckily there are measures we can take to ensure we maintain a positive and healthy mindset in the face of the unattainable “perfection” society pushes on us. If any of the scenarios below sound like things you’ve experienced, here are some steps you can take to improve your self-image and mental health. Avoiding these pitfalls can help ensure that we live our healthiest life possible, free from guilt, disordered eating, and poor body image.

Pitfall 1: Obsessively Counting Calories and Macros

Studies have shown that there is a direct correlation between disordered eating and the overuse of calorie and macro tracking apps [1,7]. Try as we may to separate the two, when tracking your calories becomes an obsession it is difficult to see food in a positive light. Food isn’t just food anymore – it’s now observed as digits and nutritive breakdowns.

Sometimes, too much knowledge in one area isn’t necessarily a positive thing when you’re using that knowledge for something destructive.

Solution: Eat Intuitively

If you cannot remember the last time you picked up an apple and ate it without automatically calculating the approximate number of carbs and sugars inside of it, it may be time to put down that tracking app [8].

We were born knowing how to eat, and we gradually lost that ability over time through outside influence. So let’s take it back to the basics — next time you have a meal, think of some basic guidelines for how to make it nutritious, pick an item from each food group (protein, fat, carbohydrates), and be sure to include fruits and vegetables. Eat slowly, eat mindfully, and choose foods you actually enjoy eating.

The emotional and social aspect of eating is an integral part of our livelihood. Food should satisfy you, energize you, and bring you happiness. Try not to overthink it.

Pitfall 2: Exercising to Burn Calories Rather Than to Promote a Healthy Lifestyle

While exercise can help relieve some depressive symptoms and decrease anxiety, more is not always better; exercising can have detrimental effects on your physical and mental state when done to excess [2,4,10].

I can’t tell you the amount of times I used to go for a run just because I had a bite of cake when I didn’t “earn” it, or when it wasn’t a part of my meal plan. If I didn’t find a way to burn away my transgressions, my anxiety would soar and I would panic. Exercise became nothing more than a way for me to assume control when other parts of my life felt like they were in a downward spiral.

Solution: Exercise to Get Stronger, Move Better, and Feel Better

Set your focus on building strength and stamina. Think of exercising to improve your overall health rather than simply using it as a tool to create a bigger dietary deficit. Exercise for longevity — it should never be a form of punishment or something you feel obligated to partake in out of shame.

Find something you love to do, whether that is weightlifting, snowboarding, tennis, hiking, running, swimming, team sports, martial arts, or anything else you can think of! Exercise should be enjoyable, and an integral part of your self-care.

Pitfall 3: Following Too Many Fitness or Fashion Model Accounts on Social Media

Now, don’t get me wrong: just like anyone, I certainly love to admire a beautiful model from time to time. However, now that we have higher access to these images at a moment’s notice, it can cause us to create extremely unrealistic standards for ourselves.

We tend to compare ourselves more to those we see in photos than those we observe through other media, such as television, due to the fact that photos can be retouched and filtered to perfection [3,5,6].  This unhealthy comparison can lead to unhappiness in our lives as well as the lives of those around us, because it affects our interactions with them and ultimately our quality of life. We don’t realize how many of those images are doctored up, and that the person behind them is just another human with their own doubts and insecurities.

Solution: Be Mindful of the Images You Surround Yourself With

Next time you are about to hit the “follow” button on Instagram, ask yourself a few questions:

  1. Does this person offer something of value to my life?
  2. Does this person make me feel good about myself?
  3. Does this person have a good message?
  4. Does this person promote a healthy image and lifestyle?
  5. Does this person promote unrealistic standards?

If you are following people simply for the sake of scrolling through their feed and admiring their seemingly perfect body, face, and life, just do yourself a favor: don’t.

If the person you are following makes you feel insecure, jealous, or bad about yourself, do not continue following them. There is nothing wrong with looking up to someone who inspires you, but make sure they inspire you for the right reasons.

Pitfall 4: Using Negative Self-Talk

Every time we say something negative about ourselves, it becomes more of a reality in our minds.

Words are powerful, and while we could be using them to lift ourselves up, sadly so many of us use them to put ourselves down.

It’s not always so obvious, but you’d be surprised how much of an effect it can have on your self-esteem and physical progress long term to continue talking down on yourself, even if you’re doing so in a humorous, self-deprecating way.

Solution: Refer to Yourself Lovingly

It’s time to drop the self-deprecation — your life isn’t a “Roast Yourself Challenge.”

Next time you refer to yourself, take a moment to consider the words you intend to use. If what you are about to say is negative, find a different word to use to describe yourself — even if it sounds silly when you say it, and even if it’s exactly opposite of how you feel. I call it, “The Antonym Game” — for every bad word I would use to describe myself, I replace it with a more positive, contrasting expression.

It’s not necessarily about positive affirmations. Sometimes it’s just about challenging yourself to transform your negative talk into something positive or neutral. The better you get at doing this, the more it inherently sticks in your mind.

Pitfall 5: Believing Your Mental Health Is Secondary to Your Physical Health

When we think of taking care of ourselves, we usually refer to caring for our physical bodies and appearance, putting our mental health to the side. However, the two are not mutually exclusive.

Mental health is just as important as physical health, and it is difficult to have one without the other. Eventually, something has got to give. We invest so much in caring for what our body looks like on the outside, while on the inside we wither away.

Solution: Take Care of Your Mental Health

Mental health is the backbone of our entire well-being. Without this kind of self-care, everything else falls to the wayside.

Take time to relax every day, and practice mindfulness. When you are feeling overwhelmed, step back and breathe. Take time to acknowledge when you are not feeling well, and do whatever is necessary to centre yourself and help yourself feel better.

If needed, seek professional help for your mental health. There is never shame in having someone to talk to who can help us make healthier choices and find new balance in our life. These problems can be tough to tackle on our own.

When we take care of our mental health, we take care of our body the best way that we know how. One cannot thrive without the other.

Above all else, remember that numbers do not define you. The moment we relinquish the need for absolute control is the moment we allow ourselves to open up and heal. The path to recovering from mental illness begins with your mindset. Some of us may battle with it for a lifetime, but all of us can take steps every day towards leading the best and healthiest life we possibly can.

Recognize when there is a problem, and do whatever is necessary to achieve balance. Only then can we begin to end the cycle of harmful thought.

How to Choose a Barbell vintage gym barbell

“How on earth can you break a barbell?”

That was the question I was asking myself standing in my driveway with, well, a broken barbell…

Years ago, when I purchased my first barbell I didn’t put much thought into type or quality. They are just barbells…right? That thinking (or lack thereof) led to my first barbell breaking within 24 hours of purchase.

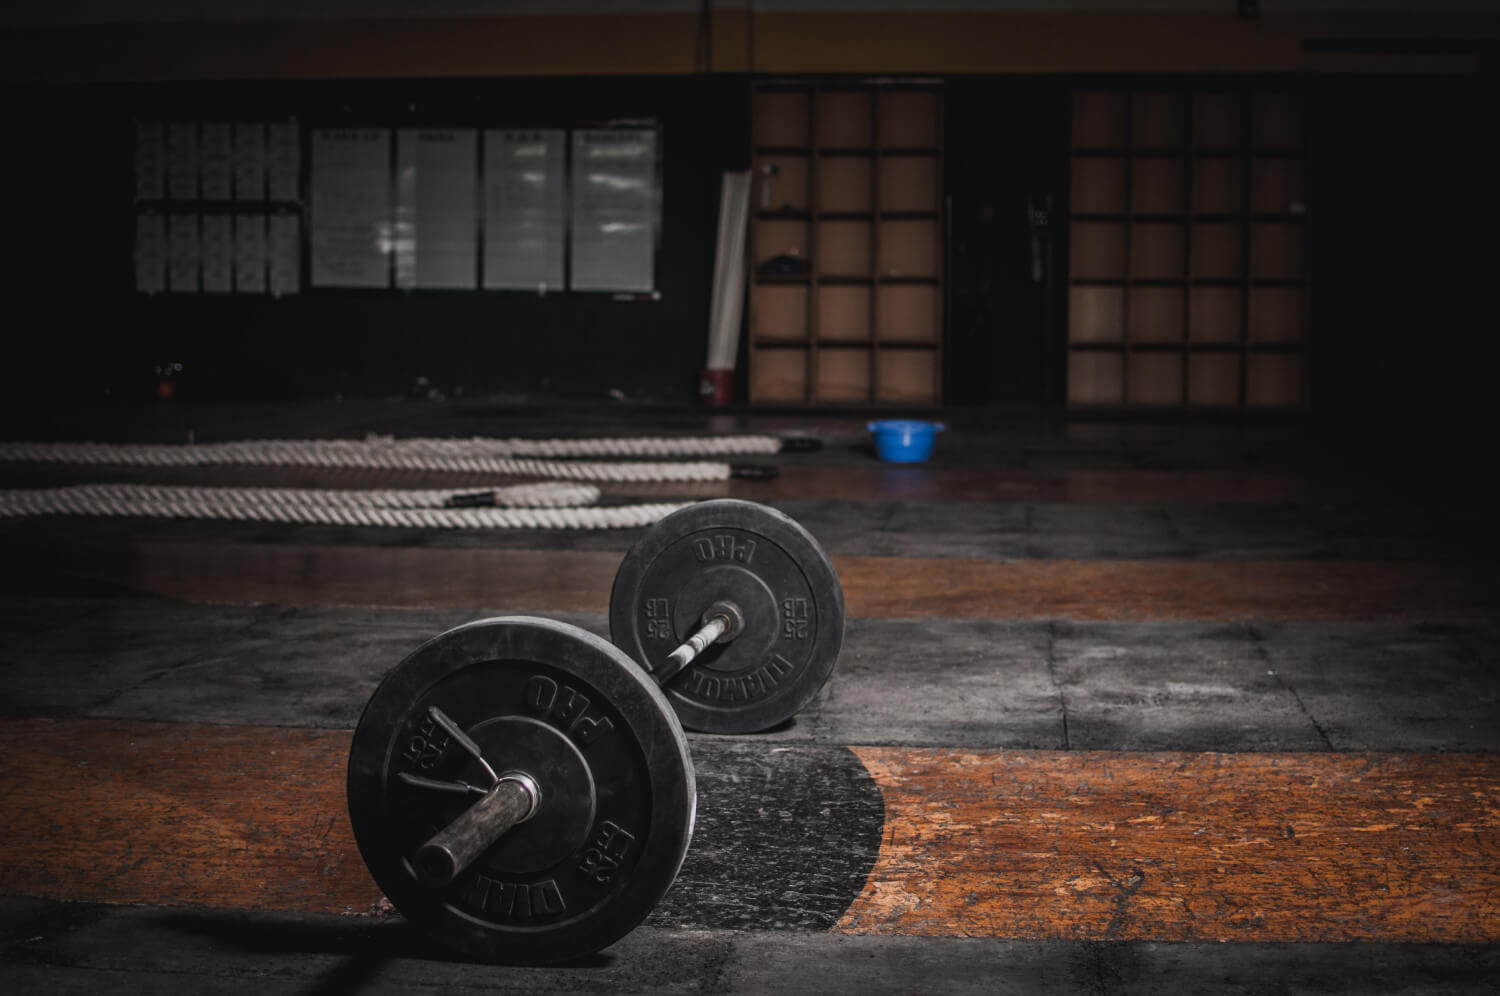
Well, with broken barbell in hand I decided it was time to uncover some of the basics as to what makes a good, durable barbell. What I found was that they can range from $200 to $2,000, and they are a little more complicated than your average sporting goods store would have you believe. A barbell serves as the foundation of true strength training. You can get by without a lot of things, but you cannot get by without a barbell.

Buying the right bar will help you to avoid big issues — they can warp, bend, rust, and break. The most common bar mishaps are bending from missed lifts, and sleeves popping off from, more or less, cheap manufacturing. Today, I want to make you an informed consumer of the barbell.

Before you can truly make an informed decision you need to know exactly what a barbell consists of — its “anatomy.”

A commonly used barbell has a 28-29 mm diameter shaft for men and 25 mm for women. Barbells come in all shapes and sizes, but the standard length is 7.2 ft for men and ~6.5 ft for women. They weigh ~44 pounds for men (20 kg) and ~33 pounds for women (15kg).

First, you have the bar itself, or shaft. It’s put through a machining process to get it to the right length and diameter. On the shaft, you have what is called knurling. Knurling is simply the rough, cross-hatched pattern you see on a barbell. Knurl is very important and is mainly for grip. It is machine-pressed and can be extremely rough, or smooth, depending on the manufacturer. It is important to feel the bar to get an idea of what you like (unless you buy online — in that case, look at reviews), but most top-end bar manufacturers have a good knurl. Where knurling can differ, even on top-end bars, is where the knurl does and does not exist. Some bars have knurling that extends all the way to the sleeves, and some bars have a gap of no knurling where the bar meets the sleeves. Sometimes bars will have center knurling and sometimes they won’t. You have to decide what you want and what you are most comfortable with.

If, say, you like Olympic lifting and you prefer a wide snatch grip, I suggest getting a bar with knurling that extends to the sleeves (if that sentence made no sense, then don’t worry about knurling going to the sleeves).

If you are often shirtless or do high-rep front squats and presses (CrossFit anyone?), you may want to go with no center knurling. If you regularly squat heavy weights and need the bar to grip the back, get the center knurling.

Furthermore, the markings on the knurl indicate which type of bar you are using. I recommend a dual marked bar for general purpose use. However, the outermost marking indicates an Olympic lifting bar and the inner marking indicates a powerlifting bar, and we’ll talk more about those in a minute.

It comes down to how it meets your needs and style of fitness.

Next, we have the sleeves.

The sleeves are simply where you put the weights. They are created from drawn-overmandrel (DOM) tubing, a machine process that makes the sleeves straight and strong. The biggest thing you are looking for in the sleeves is the rotation, or how the sleeves spin on the shaft. Unless you are extremely picky, or a professional lifter, the difference in bearings or bushings aren’t that important. Bushings are a low friction material placed between the shaft and the sleeve — they are more affordable, and they are what you will find on most bars. Needle bearings spin more smoothly, and are actual bearings between the shaft and the sleeve. Generally, bearings are on the high end bars. Bushings will save you a lot of money, and work perfectly fine, without having to go high-end. But, if you want the premium, then go bearings. Bearings are better — you aren’t paying more without reason — but the difference would only be noticed at the professional and elite levels.

Sleeves are also connected by bolts or snap rings. I will make this one very easy for you. Snap rings only! Stay away from bolts on a bar! Bolts = broken in 24 hours.

Also, know barbells come in many finishes — chrome, zinc, black oxide, unfinished, and even stainless steel — but also know that the finish is primarily an aesthetic preference. Stainless steel does provide an advantage because it is rust and corrosion free, forever.

Barbell Strength

At this point, you already know more than your average gym-goer, but let’s make you a true barbell connoisseur.

The strength of a barbell is very important. You need to know the terms I am about to go over because when you shop for a barbell, this is the information manufacturers will give you. If you have no idea what the numbers are referring to, how do you know what to buy?

Bar strength is reported in three areas: tensile strength, yield strength, and test.

Tensile strength is the maximum load your bar can support without fracturing or breaking. So high tensile strength = good bar. This will be your primary determining factor.

Yield strength is basically how much weight the bar can handle before it will become deformed — that is, it won’t return to perfect straightness. Breaking and deformation are very different. Unfortunately, you will be hard-pressed to find a manufacturer that provides yield strength information.

There is also test, which means the bar has been loaded and tested with weights at which there was no bending or breaking, so the higher, the better. It’s best if you can find a manufacturer that will give you a tensile strength rating, which is reported in pounds per square inch (PSI).

Never miss an update

Subscribe to the AoM Newsletter

Now you know the terminology, but what is a “good” rating? Here is a starting point for the most important factor — tensile strength ratings:

  • <150,000 PSI = Ehh
  • 150,000-175,000 PSI = Good
  • 175,000-200,000 PSI = Better
  • >200,000 PSI = Best

A bar in the good range is perfectly acceptable and will last a very long time. Considering cost and quality, most people do not need more than the “good” level bar.

If you are getting into sport weightlifting, there are differences in Olympic lifting bars and powerlifting bars:

  • Olympic weightlifting bars have more of a whip, or spring, to accommodate the sport.
  • Powerlifting bars are very stiff, as powerlifters prefer no surprises or major fluctuations during a big lift.

Barbell Plates

Next, you have to think about plates. Unless you plan on competing at the professional level, plate quality is not as vital as the quality of your barbell.

Price can vary greatly with plates. You can get 300 lb. of iron at a garage sale for $30 or you can spend $3,000+ on a couple hundred pounds of certified competition bumper plates.

The most frequently asked question is whether to purchase bumper plates or iron (metal) plates, and that depends on the type of lifting you plan to do. If you like powerlifting (squat, bench press, and deadlift), then you will be just fine with iron plates. If you are dropping the bar frequently during CrossFit workouts or practicing the snatch and clean and jerk in Olympic weightlifting, you’ll need bumpers.

Personally, I prefer a blend of iron and bumper plates in my arsenal, and I’ll explain why and some considerations in just a minute. First, let’s talk bumper plates.

When it comes to bumper plates, what you are paying for is the thickness of the plate and how much they bounce when dropped.

Here is a quick breakdown of their categories:

  • Black bumpers ($): Thick with a big bounce
  • Colored bumpers ($$): Thick with less bounce
  • Olympic training bumpers ($$$): Thin and dead bounce
  • Competition bumpers ($$$$$$$): Thin and dead bounce + certified weight to the gram

They all should be 450mm disks with a 50mm opening. Economy black bumper plates are going to be good enough for 95% of people; 4.9% will want/need colored bumpers or Olympic training bumpers, and .1% will need certified Olympic competition bumpers. Colored plates generally follow a color coding, and some companies do follow the color code of the International Weightlifting Federation, but not all do. The official color coding can be found at the IWF website.

I like to have around 300 lb. of cheap iron plates along with another couple hundred pounds of black bumpers. I use the bumpers for when I am going to be dropping the weight, and I use a combination of iron and bumpers if I am doing a heavy back squat.

You’ll be hard pressed to find bumper plates at a garage sale, so you will need to order them online, but iron plates are a completely different story.

For iron, here’s where you use the power of Craigslist to find a lot of weight for pennies on the dollar. People are constantly moving, giving up on at-home fitness, and letting plates sit in their garage and rust. That’s a win for us! The easiest way to shop for plates is to put it on autopilot using a combination of Craigslist and IFTTT; you can read about how that works here. Basically, you set up a program that will notify you when plates come up for sale in your price range.

Conclusion

Most people are looking for a general, high-quality bar, and there are plenty out there that are suitable for all training and that will last for a long time. So, unless you are planning on becoming an Olympian, I would stay away from the “Cadillac” bars. You can get a good barbell that will meet all of your needs for around $250, and the near-perfect bar for around $500.

That can seem like a lot of money for a barbell, but it is the heart of your training, and you will be using it day-in and day-out. Don’t get a bar that will bend or fail while you are using it.

Get a bar that will last a lifetime. It is an investment in your fitness and your health!

And that, gentlemen is all you need know about plates, weights, and barbells.

Now, let’s start your story differently than mine.

“How on earth can this barbell withstand this abuse?”

That will be the question you are asking yourself while standing in your driveway with, well, an amazing barbell.

Hiring the Nutrition-Fitness Hybrid Pro

What are consumers looking for when they come to your gym or studio? Sure, they want great workouts and access to the latest equipment in a welcoming, fun environment. But above all, they really want to attain their health and fitness goals.

At our gym—One on One Fitness in State College, Pennsylvania—we’ve learned that lasting, consistent client success depends on intelligent nutrition and habit-change strategies. Thus, we’ve pivoted from workouts to wellness to help clients succeed—and to differentiate our business. We focus on three areas: fitness, nutrition and lifestyle habits.

We’re making this happen with a new job title: the nutrition–fitness hybrid pro. We recruit registered dietitians who love fitness, and then we train them to be fitness professionals.

It’s an incredibly exciting opportunity for the right people. These RDs interact with clients in ways that they wouldn’t normally, as clinical dietitians. Moreover, they help clients in ways that a dietitian or personal trainer, individually, could not.

“I became an RD because I have a passion for helping others,” says Haley Golich, RDN, LDN, a recent addition to our team at One on One. “The nutrition–fitness hybrid position enables me to promote healthy living, help clients set and achieve health goals, and contribute to the prevention of chronic disease. It is the ongoing interaction with clients that intrigued me the most.”

Advantages to This Professional Model

We employ four RDs and are recruiting more. Here’s what we’ve observed since implementing this strategy:

Our Pool of Hiring Candidates Is Wider

Hiring/recruiting quality fitness professionals can be a significant challenge because it’s so hard to find that “gem” of a personal trainer who is competent, professional and (of course) looking for work. The nutrition–fitness hybrid position lets us recruit outside the pool of personal trainers and kinesiology students.

“When I went off to college, I couldn’t decide whether I wanted to study kinesiology or nutrition,” says Bethany Paszkowski, RDN, LDN, another member of our team. “They both interested me, and both would allow me to achieve my longer-term goal of helping people. This position is perfect for me.”

RDs Have Advanced Skills

When hiring an RD, you’re getting someone who is dynamic, smart and organized. Five years of vigorous education forces a person to develop many of the professional skills required to succeed in this role. Although RDs don’t have a degree in kinesiology, they quickly develop an intellectual understanding of the science and prove that they can consistently apply it in a fitness setting. Bottom line: You’re not hiring a “project.”

RDs Enjoy Career Satisfaction

This position has a strong allure for the right kind of RD. After all, RDs rarely encounter so much diversity in their tasks and such a committed client base in clinical or community nutrition jobs. “I’ve worked as a registered dietitian in both the public health and clinical settings. These settings can be challenging to impact change,” says Golich. “By combining nutrition counseling along with fitness consulting, I am able to impact clients in a comprehensive way to elicit the most positive change.”

It’s Easier to Turn RDs Into Trainers Than Vice Versa

Teaching RDs about fitness is a time-consuming but straightforward process. Conversely, dietetics is a complicated, multifaceted subject that will soon require a master’s-level education. Thus, the model works only if you start by hiring RDs. Turning trainers into RDs is rarely achievable.

The Investment Will Pay Off

RDs are used to making a healthy salary, so you will have to pay them competitively. You will have difficulty competing against the pay of a clinical setting. However, we don’t try. Instead, we attract people strongly motivated to engage in our holistic wellness opportunity. We provide a 5-week training program whose value is clear to the people we hire. They recognize that our team will teach them a trade and that we’ve made an investment in them—knowing we won’t see a return until well after they start.

How the Nutrition–Fitness Model Improves Your Business

In a competitive marketplace, fitness businesses have to differentiate themselves and generate new sources of revenue. In our market, a lot of gyms and clubs are doing the same things: offering different spins/pricing on group training and selling supplements. Although many businesses succeed tremendously on this path, we think the competition will only get stiffer.

We believe that creating a one-stop shop focusing on fitness, nutrition and habit change is a win-win that helps our business while giving our clients the best opportunity to succeed. We hired our first full-time RD in 2015, and our nutrition program became profitable after about a year, mainly through individual counseling sessions.

Some of the most significant benefits are intangible. Having RDs on staff clearly differentiates us from our competitors and solidifies our position as leaders in our field. RDs also get nutrition clients interested in fitness, educate our community and contribute to our social media updates.

What you need for an Alpine adventure – written by expert guide Kathy Murphy

Kathy Murphy, IFMGA Guide (she was the second British woman to achieve this status), runs our mountaineering and glacier trekking holidays in the Alps. She guides many of these trips herself and her particular brand of leadership, described variously by clients as ‘highly professional’, ‘fun’ and ‘kick-ass’, makes her a very popular choice. Here she gives a no-nonsense guide to her Alpine essentials for trips which involve carrying your equipment throughout.

1). Comfy boots – stiff enough to hold a crampon well, comfortable enough for long descents back to the valley and warm enough for early starts from high huts. My favourite boot is the La Sportiva Trango Alp GTX. It’s a B2 boot, so it’s got a bit of flex in the front half, as well as good support around the ankle. Worn in a bit to avoid blisters – it does the job well.

2). Ankle gaiters/mini-gaiters – these keep the snow out of my boots and are not as heavy, bulky, hot or as expensive as full-size gaiters. Grasmere DRY Gaiters by Trekmates are my mini-gaiters of choice.

3). Crampons – I use Grivel G10’s with anti-balling plates already fitted. They have the ‘new-matic’ system – a plastic cup at the heel and toe which means they fit any boot – even my ski-mountaineering boots in winter. Plus, the flexible central bar means they’re more comfortable than a rigid crampon and don’t pull on your heel and cause blisters.

You will notice that the first three essentials are all to do with my feet – if my feet aren’t happy then neither am I!

4). Travel sized bits and pieces – these are easily found in the UK and at the airport shops – so a travel-sized toothpaste, shampoo, conditioner, sun cream etc. And to go with this – a pack towel – these dry quickly and pack up really small.

5). Drinking water – It’s always important to stay hydrated when in the mountains. Make sure you take a reusable bottle you can fill up along the way!

6). Pack of cards – great for passing the downtime in the huts. It’s sociable and I have a whole selection of card games that anyone can quickly learn and a few tricks up my sleeve! Obviously, 1 pack per group is enough!

7). Rucksack – my new pack for this season is a Millet

Prolighter 32 in the shorter back length womans version. It fits well to my back, close, no fancy frames – when I’m carrying a pack I want the load to be stable against my back, not wobbling several inches away from it. Importantly, it has 2 compression straps on each side which effectively make the pack smaller when it’s not full and are also useful for stashing walking poles or ice axe. It’s also light at around 1kg. Avoid packs with gimmicky features such as back systems which add weight. Why else did I choose it? It’s blue – my favourite colour!

8). Waterproof overtrousers –the clue to these is in the name – they should fit over everything you are already wearing, including your harness! Again, I go for light weight but with a full-length zip that comes up to my hip which means I can put them on over my boots and crampons. When I’m back in the UK I always buy a new pair of Goretex Packlite Overtrousers made by Berghaus.

SRAM Force eTap AXS unlocks 12 speed, Red-like performance for less

SRAM has clearly been busy. Less than two months after launching the new RED eTap AXS group to the world, they’re already onto the next. That of course being the new SRAM Force eTap AXS group. As is often the case, the group is extremely similar to RED, but with some key differences that will be significant to many consumers – particularly when it comes to price.

The newest member of the AXS (access) wireless family, SRAM Force eTap AXS is an electronic drivetrain with wireless shifting and options for either hydraulic disc or mechanical rim brakes. Other than a few very small details, Force is nearly identical in performance to the new RED AXS, with the main differences being materials, construction, and therefore weight. That means that the batteries are the same between the two groups (and older eTap groups as well) which is good news for teams or individuals with multiple bikes. Even the motors and chipsets are the same meaning the shift speed is identical between the two groups. Ultimately, Force ends up about 300g heavier than RED, but it’s also over $1000 less expensive which seems like a worthy trade off.

Force also has a completely different look which comes down to a difference in finishes. While forged aluminum parts can be polished to a beautiful shine, cast pieces can’t be polished – which requires a coat of paint. Overall, the finish on Force is less sophisticated which is where SRAM was able to drop some of the price.

AXS App

Like RED, Force is able to take advantage of the AXS app and component integration system which allows you to monitor and customize the performance of individual components. From checking each battery’s power level to customizing your shift patterns, updating firmware, and more, Force is joining the way of the app-based world.

Also like RED, this is a completely new group, so other than the mechanical rim brakes, none of the new parts will be compatible with older SRAM components – except of course the new SRAM RED eTap AXS. These two groups are completely interchangeable – which is good news for those who were upset by SRAM’s choice to integrate the power meter and chain ring on RED (but for a good reason, more on that below).

New gearing options just like RED… mostly

Following right along, gearing is also one of the biggest changes for SRAM Force. Yeah, they’ve gone to 12 speed in the rear, but as usual, it’s about more than just adding another gear. The new X-Range gearing ends up wider on both ends while the added cog results in better gear progression. The addition of the 10t cog allows for an increase in gear range without an increase in overall size of the drivetrain package with SRAM pointing out that smaller drivetrains will be lighter, less costly, and simpler overall.

In terms of chainring options, Force will see 48/35 and 46/33t double combinations with the largest 50/37t combination only available in RED. By moving to a 13t jump between chainrings, SRAM says this 20% reduction in jump size results in better shift quality and better front shifting overall.

To keep the overall range, the rear cassettes move to a 10t at the small end, and up to 26, 28, or 33t as the largest cog with 260, 280, and 330% range respectively. Even the smallest cassette at 10-26 offers a wider range than an 11-28t. Moving the range from the front of the bike to the rear should mean you can stay in that current front chainring longer without having to shift. Obviously, if you’re running 1x, wider range in the rear is also a very good thing. The new cassettes also offer more single-tooth jumps between cogs for better shift progression when you’re moving through the gears.

Cassette options

In terms of construction, the XG-1270 cassette uses a Mini-cluster/Pin-Dome configuration with the first four cogs machined from a steel billet, and the remainder of the cassette using their Pin-Dome technology similar to their GX mountain bike cassettes. Looking at the cassette in profile, Pin-Dome makes more sense as you can see the pins that hold all of the steel cogs together after the first four cogs. The largest cog is aluminum which cuts down on weight and allows for a secure connection between the cassette and the freehub body that won’t dig into the new XDR drivers. The Mini-cluster/Pin-Dome cassette ends up about 50g heavier than a comparable RED cassette.

XDR Required

The addition of a 12 speed cassette meant that SRAM had to move to the XDR freehub standard like RED, which is just like XD, just 1.85mm longer. The added width is needed for the road since the largest cogs aren’t nearly as big as those on a MTB cassette and can’t be dished over the spokes. It also now matches up with the width of HG 11 speed freehub bodies for road.

Importantly, you can still run cassettes meant for XD freehubs on XDR freehubs with the addition of a 1.85mm spacer. You can’t however run cassettes meant for XDR freehubs on XD freehubs. SRAM points out that any Zipp wheels post April 2015 (176, 177, Super 9, and Cognition hubs) are XDR ready meaning you can add an XDR freehub. Also, the SRAM 900 hubset has included an XDR drive for awhile now – before you really needed it.

One Rear Derailleur to Rule them All

When it comes to choosing your drivetrain, you can run any cassette with any chainring combination all with the same rear derailleur – 1x or 2x. The new rear derailleur has been optimized to work with all of the cassette options in either chainring configuration and includes larger X-Sync pulleys with steel bearings, and the Orbit fluid damper in place of a mechanical clutch. Note that there is no longer a Cage Lock feature, but the Orbit damper works a bit differently and doesn’t really affect wheel changes. Compared to RED, the Force rear derailleur uses an aluminum derailleur cage instead of carbon, and steel hardware in place of titanium and aluminum.

Front Derailleur is Still There, and Better Than Ever

Up front, the new Force front derailleur is very similar to RED, but it swaps in a stamped steel derailleur cage for the CNC machined aluminum cage on RED. Riders who are pushing larger tires will be happy to hear that the derailleur has been streamlined to offer better tire clearance at the rear as well.

Force gets a Flattop

Completing the gearing is the new FRC-D1 Flattop chain. This new chain style is required for the group with SRAM stating that this chain represents their biggest investment in tooling on their part when it came to the new group. While it did get narrower to fit another cog, there is more to the story as usual. The shape of the chain is purely driven by their strength testing – the top of the chain never rides on a gear, so it can be shaped differently to provide increased strength.

Proportionately, the chain is also narrower to the cog spacing than a comparative 11 speed group which SRAM claims results in a quieter ride overall. The FRC-D1 chain is interchangeable with the SRAM RED chain, with the Force chain using solid pins as the only noticeable difference. Note that Flattop chains require a specific Flattop PowerLock. Also note that you definitely don’t want to run the new chain on 11 speed cassettes (think putting your bike on a direct drive trainer with an 11 speed cassette mounted). Apparently, the new chain will destroy the cassette, which is why companies like Wahoo are quickly working to add XDR driver capabilities to their trainers.

Acronym Glossary

If you haven’t already picked it up from RED, the new SRAM Force group comes with its own lingo, so here’s the breakdown:

  • AXS – Refers to the new digital family of wireless/electronic components that will all work together. Check our AXS overview story for everything you need to know on that. Basically, anything with the AXS logo can communicate with each other.
  • X-Range – The name for this entire new gearing concept.
  • Orbit Chain Management – A new fluid damper system that improves chain retention while still allowing for fast shifting.
  • AXS app – Lets you customize the setup and integrate cross-category components, check riding time, battery level, how many times you’ve shifted, and when you’re due for service.
  • FlatTop – The new, narrower chain that’s also stronger, quieter and more durable. It’s not backwards compatible (nor is any other component), everything here is designed as a system to maximize performance.

SRAM Force Cranks

With the launch of RED AXS, one of the things that seemed to catch everybody’s attention was the decision to integrate the power meter into the chainring. Yes, this means that when the chainring is dead, so is your power meter. But SRAM stands by the design, and here’s why: SRAM RED is meant to be the highest tier group for pro racers and consumers willing to pay top dollar in exchange for the lightest system possible.

The integration of the power meter into the chainring meant that SRAM could add power to the same crankset at a weight penalty of just 36g. It also ends up with a more accurate power reading because you’ve eliminated one of the connections at the spider/chainring interface. SRAM also claims that the new drivetrain offers much longer chainring and component life than previous groups, with field testing showing a whopping 2-4x increase in longevity – so it should take you much longer to wear out those rings.

Is it wasteful to create a one-time use power meter/chainring? Sort of. But that all depends if you take advantage of the SRAM support program where they take your old power meter/chainring back and recycle it while providing a new one to you supposedly at or near the cost of standard chainrings. That integrated power meter/chainring is starting to sound a lot better all of a sudden.

Change your rings without changing your power meter

BUT… what if none of that matters and you simply want to run power on your SRAM AXS crank without an integrated power meter/chainring?

You’re in luck. The Force chainrings and DZero power meter are not one piece, and the Force DZero power meter spider is compatible with SRAM RED crank arms using the same 8 bolt direct mount interface. That means if you buy a SRAM RED AXS crank with power and wear out the chainrings super fast (or just want to upgrade a non-power model), you can purchase a Force power meter spider and the Force AXS asymmetric 107 BCD (same as RED 1x) chainrings to go with it. This also allows for mixing and matching 1x chainrings from the RED group or their aero 1x chainring for TT/Tri bikes.

SRAM Force cranks will be available with or without power meters in 1x or 2x configurations, both of which separate the chainring from the power meter.

Keeping in line with all of the new cranks from SRAM, the Force cranks will include a  DUB spindle option, but they will still offer a GXP version for Trek’s BB90 frames, Pinarellos with Italian threaded BBs, and other frames that require it.

SRAM Force eTap AXS brake/shift levers

At the controls, Force eTap AXS is all about wireless shifting – though not necessarily about hydraulic brakes. For those keeping the rim brakes alive, the Force eTap AXS group will be available in two versions; wireless shifting with mechanical rim brakes, or wireless shifting with hydraulic disc brakes.

The hydraulic option uses their Hydro HC platform specifically developed for eTap which means these brake calipers are different than those found on Force 1. The Force group uses a two piece caliper design with steel hardware, and the same brake pad as RED. Also, the Force brakes are flat mount only. Still running a post mount frame? The RED brakes are available in post mount as well as flat mount.

SRAM’s new Centerline XR (CLX-R) rotors are a thing of beauty and are the same rotors that you’ll find with SRAM Red. The rotors use an aluminum carrier and a steel CenterLine braking surface with rounded edges to be UCI-Compliant.

Rim Brakes Still Stop

The new Force group even includes a new mechanical rim brake if you are retrofitting an older bike or just don’t want to switch to disc. The brakes use a dual pivot design that is updated to fit wider rims and tires (up to 28mm), and include Swissstop Platinum Flash Pro pads for carbon or BHP pads for aluminum rims.

Offering independent reach and contact point adjustment, the levers are nearly identical to RED other than they have just one Blip port rather than two on each shifter. You’ll also find a composite lever blade rather than true carbon fiber which makes a negligible difference in weight. While the derailleurs get their own rechargeable batteries (which are the same as all eTap groups), the levers use a CR2032 coin cell battery housed in the bottom of the lever. Since these simply have to power a single button, the batteries should last quite a while. How long? We aim to find out (maybe) in a long term review.

The AXS app offers the same tuneability with this group, letting you switch the way the buttons and levers work the derailleurs, switch shift modes between regular, compensating and sequential, and even pair with a dropper seatpost or whatever else comes down the pipe.

Tri HRD

There’s also a complete 1x TRI HRD group available with hydraulic aero levers for the hydraulic disc brakes and a new, smaller Blip Box. SRAM states that running a 1x drivetrain with a 48t chainring and the 10-33 cassette would give you the same range as a 53/39 with 11-26. That happens to be the most prevalent Ironman gearing combo they see on 11-speed bikes, only now you don’t have a front derailleur to shift, you have a lighter drivetrain, and you still get six 1-tooth gear steps on the cassette.

Availability, pricing, and actual weights

As much as we love knowing about new products ahead of time, it’s much better when you can go out and buy a new product as soon as you read about it. That’s the case with Force eTap AXS – groups are shipping as of today and you’ll find more than 150 different bike models equipped with the group hitting showroom floors. Initially, Force will only be available as a complete groupset, but in a few months you’ll have the ability to purchase individual parts.

In the U.S., complete groups will run from $2,078 to $2,678, well under the price of RED.

We got all of the loose parts we could find on the scale at Road Bike Connection, but because of all the options and things like the fact that the FD and RD didn’t include batteries, SRAM has provided the list of weights above. As mentioned, the group should work out to be about 300g more than SRAM RED eTap AXS.

Peekaboo Boxing | The Fading Art of ‘Aggressively Safe’ Boxing

The peekaboo style is as misunderstood as it is notorious. But the fact that it’s so widely misunderstood could actually work in your favor.

The core peekaboo principles give boxers a safe and loaded “base of operation”, enabling the fighter to move where they want, when they want, and thus, controlling their opponent and the fight with minimal risk. Now, this luxury of control doesn’t come easy. There are a few things you need to be aware of if you’re going to implement the best parts of the peekaboo style into your boxing skill set.

In this article, I’m going to show you how to capitalize on Cus D’Amato’s boxing philosophy without falling into the pitfalls that many boxers criticize the peekaboo style for.  I’ll discuss the criticisms shortly, but first, I think it’s important to highlight the man behind the peekaboo boxing style and how he engineered it.

Cus D’Amato was born in 1908 to a blue collar, Italian family in The Bronx, New York. Cus briefly boxed as an amateur in the featherweight and lightweight divisions, but an eye injury prevented him from obtaining a professional license. However, as we know, thankfully, this was only the beginning of his legendary career. Cus’s dedication to training up-and-coming boxers led him to literally sleeping in his gym in New York. Cus believed in positive thinking. He would have his students memorize things like, “The mind always makes things worse than they really are.” And, “A professional always does what needs to be done no matter how he feels.” Getting up at 5 am to do roadwork or going to the gym to train, a professional does not follow their feelings. He wanted his young students to always remember that, “Your feelings will lie to you.”

Cus was one of the first boxing trainers to implement psychological training. He brought Zen to boxing before most people in the western world even knew what Zen was. He said, “Heroes and cowards feel exactly the same fear. Heroes just react to it differently.” He spent a lot of time teaching emotional control. Example: Tyson eventually admitted that he was terrified before every fight, but looking at him, he was often the source of his opponents’ terror. D’Amato genuinely cared for his boxers, developing father-son bonds with many of them. Even after Floyd Patterson decided to part ways with Cus, he would never talk negatively of Floyd, nor would he let any of his fighters. Eventually, Floyd would come to admit that he regretted nothing in his life except the time he was apart from Cus.

He took care of his fighters so much so that Cus filed for bankruptcy in 1971, but it was never apparent that any of his fighters felt such financial pressure. In fact, Jose Torres estimated that he had earned roughly $1 Million in his career, “and Cus never took a penny.” Cus also fought and protected his boxers from the politics of boxing at the time, many times refusing to take fights because of who the opponent was associated with and their perceived backroom dealings.

What was less publicized, but perhaps most intriguing is that he served as an occasional adviser for the late, Greatest, Muhammad Ali. The city of New York renamed the street where his Gramercy Gym was located to “Cus D’Amato Way”. There’s been books and documentaries done on his life, and still, his impact on boxing doesn’t get the recognition he deserves. The man has undeniably left a massive, well-respected legacy in the boxing world. Now, on to the style he dedicated his life to perfecting…

There’s something incredibly intriguing about the peekaboo style that seems to get lost or at least overlooked in today’s complex world of boxing. There’s so much information and so many videos to study that it’s easy to lose sight of the essence of what made the peekaboo style so effective. Cus said, “Slipping punches is the hardest thing to learn. But once you get it, that’s when boxing starts to become fun!”

Very few boxers have been able to incorporate the style as Cus himself had engineered it. Most notably, obviously, is Mike Tyson. If we go back even further, other Gramercy alumni include: Floyd Patterson, a 1952 Olympic Gold Medalist and former World Heavyweight Champion. Jose Torres, a 1956 Olympic Silver Medalist and former World Light heavyweight Champion. Joey Hadley, a 6-time Golden Gloves winner. And Kevin Rooney who trained Tyson after Cus passed in 1985 until 1988.

During his time training under Rooney, Tyson accrued 35 wins (31 by knockout), and set a record as the youngest World Heavyweight Champion in history just 4 months after his 20th birthday. Despite the obvious success of his students,  a good amount of criticism has been hurled at the style. Most notably, many believe:

– An efficient attack cannot be launched from the stance
– It relies too heavily on power
– The fighter eats too many punches on the way in
– It doesn’t utilize the length of taller fighters

Now, not to say there’s no validity in these critiques. But most of these problems that boxers run into when trying to adapt to the peekaboo style can be avoided.To get the most out of the style, we need to be conscious of a couple things:

First: The peekaboo learning curve is steep. Many fighters will give up before they fully understand the key principles of the style. I think this is largely due to a lack of coaches who know how to teach it.

Second: When most people think of peekaboo boxing, they think of Mike Tyson, and rightfully so. Tyson displayed, for the entire world, in spectacularly brutal fashion just how effective the style can be. The problem is, while Tyson is solid proof that peekaboo boxing can be a viable style, even at the highest levels, his idolization has unintentionally led many boxers down the wrong path.

Here’s why:

A lot of boxers who try to incorporate the peekaboo style try to mimic Tyson. The issue is that Tyson’s style was a flavor of peekaboo that was tailored to his unique physical attributes.  His exceptional speed and power allowed him to slip punches at high volume and capitalize on counter punching opportunities that the average peekaboo fighter would have difficulty with.

The fundamental version of the style takes advantage of a high guard with minimal openings for opponents to attack.  If you strip away the exceptional speed and power of fighters like Tyson or Patterson you would have a more modern example.  One such example is Winky Wright…

Strip away all of those preconceived ideas of what you think peekaboo looks like and work on the core principles and philosophy that Cus engineered.The secret is in the details.  Learn to hold your gloves at the exact angle needed so punches either can’t fit through or they glide off the outside of the glove and miss.

Here’s a few quotes from Cus himself that should give you an idea of just how dedicated he was to the peekaboo fundamentals:

“Now, in my style, you cover up all the time. You never gamble. The right arm is always covering the liver, the left, the solar plexus, and the hands are protecting the chin.”

“You gotta be protected, not part of the time, not most of the time, but all the time. You cannot gamble by using open stance because every time you gamble and lose, you get hurt. And when a fighter gets hurt, he is intimidated. He thinks he is tired and covers up.”

“Always keep your chin tucked down into your chest. I don’t care if you are running roadwork or just walking around school or watching t.v. Keep that chin tucked down and your eyes looking up and out.”

And he wasn’t kidding…

Here’s a recent video I made that covers one aspect of this approach

A 1985 New York Times article highlighted an incident involving Jose Torres. Torres had gotten into trouble prior to one of his big fights and this was his phone conversation with Cus from the police station:

“Cus,” said Torres, embarrassed and apologetic, “I’m in the police station. I got into a street fight.”

“Jose,” said Cus, with concern in his voice, “did you keep your chin down?”

Here’s how to adopt the ‘aggressively safe’ style:

The proper way to implement the peekaboo style and truly get the best out of it requires just two things which many boxers miss completely:

1. An unwavering dedication to its fundamental philosophy (not just mimicking a specific move set).  Meaning hands up protecting the chin, forearms protecting the body and learning to maintain this position in all situations.

2. A proper adaptation to the fighter’s unique physical attributes.  If you have quick feet then take advantage of them.  If you have great visual reaction and slipping ability, then use it.

To get you started, here’s some of those core principles and philosophies for you to consider:

– A Stoic approach to controlling your emotions, when in the ring, in your day-to-day training, and even life in general.

– Active defense. Remain alert and protected 100% of the time, no relaxing or passiveness.

– Off-rhythm attacks that force opponents to be cautious, even when you’re defending.

– Intense, ‘aggressively safe’ movement and pressure, always using angles and balanced movement.

– Impenetrable defense that forces opponents to waste energy on ineffective punches.

– Draw out punches from opponents, leaving them vulnerable to rapid counters with what Cus called “bad intentions”.

If you are able to implement a more dynamic approach then move your head before and after you throw, and add angles for compound attacks.  Never give your opponent a free opening, keep your guard tight when you move so you automatically block as you pressure your opponent. Jabbing and closing the gap is often coupled with a slip in anticipation of the straight counter. Further protection can be achieved by lowering the body in conjunction with the slip; this extra bend can add even more power to rising uppercuts and hooks.

Obviously, these are a simplified breakdown of what Cus’s peekaboo style can do for you…

If you want an in-depth look at different techniques and attacks that arise from the few foundations we’ve covered here, I strongly recommend checking out my Head Movement and Getting Inside instructional video.

This training will give you:

– The essentials of slipping and ducking; how to use these motions to set up your offense while maintaining rock-solid balance.

– How to use lateral motion to create angles and close the gap; sneak attacks that catch your opponent off guard.

– How to sync your footwork with your head movement to wind up and throw once you enter the best position.

– A little trick with your back foot to create sharp angles that set you up for quick attacks with “bad intentions”.

– And plenty more.

The 8 Best Ways to Get 6-Pack Abs Fast

Whether you’re aiming to achieve your fitness goals or simply want to look good in a swimsuit, acquiring a sculpted set of six-pack abs is a goal shared by many.

Getting a six-pack requires dedication and hard work, but you don’t have to hit the gym seven days a week or become a professional bodybuilder to do so.

Instead, a few modifications to your diet and lifestyle can be enough to produce serious, long-lasting results.

Here are 8 simple ways to achieve six-pack abs quickly and safely.

1. Do More Cardio

Cardio, also called aerobic exercise, is any form of exercise that increases your heart rate.

Regularly incorporating cardio into your routine can help you burn extra fat and speed your way to a set of six-pack abs.

Studies show that cardio is especially effective when it comes to reducing belly fat, which can help make your abdominal muscles more visible.

One small study showed that doing cardio exercise three to four times per week significantly decreased belly fat in 17 men (1).

Another review of 16 studies found that the more cardio exercise people did, the greater amount of belly fat they lost (2).

Try to get in at least 20–40 minutes of moderate to vigorous activity per day, or between 150–300 minutes per week (3).

Activities like running, walking, biking, swimming or engaging in your favorite sports are just a few easy ways to fit cardio into your day.

Summary Studies show that cardio exercise can reduce belly fat, which can help you get six-pack abs. One review found that the more cardio people did, the more belly fat they lost.

2. Exercise Your Abdominal Muscles

The rectus abdominis is the long muscle that extends vertically along the length of your abdomen.

Although most well-known as the muscle that creates the appearance of the six-pack, it’s also necessary for breathing, coughing and bowel movements.

Other abdominal muscles include the internal and external obliques and the transverse abdominis.

Exercising these muscles is key to increasing muscle mass and achieving six-pack abs.

However, keep in mind that abdominal exercises alone are unlikely to decrease belly fat.

For example, one study found that doing abdominal exercises five days per week for six weeks had no effect on belly fat in 24 women (4).

Instead, be sure to pair your abdominal exercises with a healthy diet and regular cardio to boost fat burning and maximize results.

Abdominal crunches, bridges and planks are a few of the most popular exercises that can help strengthen your abdominal muscles and create the appearance of six-pack abs.

Summary Exercising the muscles that make up your abdomen can help increase muscle mass to achieve six-pack abs. Pair abdominal exercises with a healthy diet and cardio to optimize results.

3. Increase Your Protein Intake

Upping your intake of high-protein foods can help promote weight loss, fight belly fat and support muscle growth on your road to six-pack abs.

According to one study, consuming high-protein meals helped increase feelings of fullness and promote appetite control in 27 overweight and obese men (5).

Another study showed that people who increased protein intake by just 15% decreased their calorie intake and saw significant decreases in body weight and body fat (6).

Consuming protein after working out can also help repair and rebuild muscle tissues as well as aid in muscle recovery (7, 8).

Plus, one study even found that a high-protein diet helped preserve both metabolism and muscle mass during weight loss (9).

Meat, poultry, eggs, seafood, dairy products, legumes, nuts and seeds are just a few examples of healthy, high-protein foods that you can add to your diet.

Summary Protein may help reduce calorie intake, as well as decrease body weight and fat. It can also help repair and rebuild muscle tissues and preserve muscle mass during weight loss.

4. Try High-Intensity Interval Training

High-intensity interval training, or HIIT, is a form of exercise that involves alternating between intense bursts of activity and short recovery periods. HIIT keeps your heart rate up and increases fat burning.

Adding HIIT into your routine can boost weight loss and make it even easier to get six-pack abs.

One study showed that young men who performed HIIT training for 20 minutes three times per week lost an average of 4.4 pounds (2 kg) and saw a 17% decrease in belly fat over a 12-week period (10).

Similarly, another study found that 17 women who did HIIT twice per week for 16 weeks had an 8% decrease in total belly fat (11).

One of the simplest ways to try HIIT at home is to switch between walking and sprinting for 20–30 seconds at a time.

You can also try alternating between high-intensity exercises like jumping jacks, mountain climbers and burpees with a short break in between.

Summary High-intensity interval training can help increase fat burning and may be especially useful for reducing belly fat and achieving six-pack abs.

5. Stay Hydrated

Water is absolutely crucial to just about every aspect of health. It plays a role in everything from waste removal to temperature regulation.

Staying well-hydrated may also help bump up your metabolism, burn extra belly fat and make it easier to get a set of six-pack abs.

In fact, one study found that drinking 500 milliliters of water temporarily increased energy expenditure by 24% for up to 60 minutes after eating (12).

Other research shows that drinking water may also reduce your appetite and increase weight loss.

One study with 48 middle-aged and older adults found that people who drank water before each meal lost 44% more weight over a 12-week period than those who didn’t (13).

Water requirements can vary based on a variety of factors, including age, body weight and activity level.

However, most research recommends drinking around 1–2 liters (34–68 ounces) of water per day to stay well-hydrated.

Summary Studies show that drinking water can temporarily increase metabolism, reduce appetite and increase weight loss to help you lose stubborn belly fat.

6. Stop Eating Processed Food

Heavily processed foods like chips, cookies, crackers and convenience foods are typically high in calories, carbs, fat and sodium.

Not only that, these foods are typically low in key nutrients such as fiber, protein, vitamins and minerals.

Nixing these unhealthy junk foods from your diet and swapping them for whole foods can increase weight loss, reduce belly fat and help you achieve a set of six-pack abs.

This is because it takes more energy to digest whole foods rich in protein and fiber, which can burn more calories and keep your metabolism up (14).

The nutrients in whole foods, like protein and fiber, also keep you feeling fuller to curb cravings and aid in weight loss (15, 16).

Fruits, vegetables, whole grains and legumes are all nutritious alternatives to prepackaged convenience items like frozen meals, baked goods and salty snacks.

Summary Processed foods are high in calories, carbs, fat and sodium. These foods require less energy to digest and are also lacking in important nutrients like protein and fiber that can aid in weight loss.

Healthline Partner Solutions

Get Answers from a Doctor in Minutes, Anytime

Have medical questions? Connect with a board-certified, experienced doctor online or by phone. Pediatricians and other specialists available 24/7.

7. Cut Back on Refined Carbs

Cutting back on your consumption of refined carbohydrates can help you lose extra fat and gain six-pack abs.

Refined carbs lose most of their vitamins, minerals and fiber during processing, resulting in a final product that is low in nutritional value.

Eating lots of refined carbs can cause spikes and crashes in blood sugar levels, which can lead to increased hunger and food intake (17).

Eating plenty of whole grains, on the other hand, has been linked to a reduced waist circumference and lower body weight (18).

In fact, one study found that people who ate a high amount of refined grains tended to have a higher amount of belly fat compared to those who ate more whole grains (19).

Swap out refined carbs from foods like pastries, pastas and processed foods and instead enjoy whole grains such as brown rice, barley, bulgur and couscous to help support satiety and burn belly fat.

Summary Refined carbs are low in nutrients and can increase hunger levels. A high intake of refined grains has been linked to increased belly fat.

8. Fill up on Fiber

Adding more high-fiber foods into your diet is one of the simplest methods for increasing weight loss and achieving six-pack abs.

Soluble fiber moves through the gastrointestinal tract undigested and can help slow the emptying of the stomach to make you feel fuller for longer (20).

In fact, one review found that increasing fiber intake by 14 grams per day was linked to a 10% decrease in calorie intake and 4.2 pounds (1.9 kg) of weight loss (21).

Research shows that getting enough fiber in your diet may also prevent weight gain and fat accumulation.

One study showed that for each 10-gram increase of soluble fiber taken daily, participants lost 3.7% of belly fat over five years without making any other modifications in terms of diet or exercise (22).

Fruits, vegetables, whole grains, nuts and seeds are just a few healthy, high-fiber foods that you can add to your diet to help burn belly fat.

Summary Eating fiber can help keep you feeling full and may help protect against weight gain and fat accumulation.

The Bottom Line

There’s much more to getting six-pack abs than simply doing a few crunches or planks each day.

Instead, it requires following a healthy diet and maintaining an active lifestyle to help achieve your goals.

Making a few simple switches in your daily routine can get you a set of six-pack abs and improve your health at the same time.